What's A Printer Maintenance Kit: Understanding the Components & Usage of a Printer Maintenance Kit
Understanding the Contents and Usage of a Printer Maintenance Kit
It is essential to maintain your printer to ensure efficient functioning regularly. By performing monthly maintenance checks, you can increase the lifespan of your printer and have confidence in its ability to work correctly when needed. Even if you are not an expert, you can still take care of your printer at home or in the office by following seven easy tips, which include cleaning it, updating it regularly, and providing proper care.
Essential Tips for Printer Maintenance
Kits for Maintaining Printers
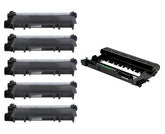
A printer maintenance kit contains all the required tools and supplies to ensure your office or home printer is correctly maintained at the recommended intervals. Different printer manufacturers have different maintenance schedules, some requiring monthly maintenance while others only need attention once a year.
Since each printer model has unique features, the components included in each kit may vary. Manufacturers are familiar with the typical areas of weakness in their equipment and, thus, offer printer maintenance kits to address them.
While there may be variations in the parts in printer maintenance kits, most of them come with common replaceable parts in commercial printer kits.
Fuser Assembly
The fuser assembly consists of two plastic rollers crucial in transferring laser toner onto paper fibers, creating a printed image on the paper.
Transfer Roller
Transferring toner particles onto a page through static electricity with the transfer roller, commonly located under the toner cartridge, is a crucial step in laser printing. This is achieved by applying an electrical charge to the transfer roller, which then attracts the toner particles from the imaging drum onto the paper.
Pickup Rollers
Pickup rollers, called feed or separation rollers, pick up the paper and safely guide it into the printer. In case of any malfunction, these rollers can prevent the printer from picking up individual sheets of paper or properly feeding them into the print mechanism.
Separation Pads
Separation pads are critical components that play a vital role in printing. They apply tension to the paper as the pickup rollers feed sheets into the printer. This tension ensures that various types of paper behave uniformly while being processed.
However, it must be noted that separation pads can wear out over time. When this happens, it can lead to paper jams and other printing issues. Therefore, regular maintenance and replacement of worn-out separation pads are necessary to maintain the smooth functioning of the printer.
Description of Corona Assembly
The Corona Assembly generates the electrical charge that enables the transfer roller to attract and transfer toner particles onto the paper sheet during printing.
Assembly of Fans
The fan assembly performs the function of pulling air into the printer in a precise manner. This air is just the right amount needed to maintain the paper's flatness as it moves through the print mechanism.
The Fuser
The fuser unit, also known as the fuser, is a crucial component in laser printers. Depending on the printer's design, its lifespan typically ranges from 50,000 to 200,000 pages. Smaller, more affordable printers usually have shorter fuser lifespans, while larger office printers tend to have longer-lasting fusers that are easily replaceable.
The fuser unit plays a vital role in laser printers. Applying pressure and heat effectively fuses the toner powder onto the paper to create a printed document. Without a functioning fuser, the printer cannot operate.
Over time, the fuser unit will require replacement due to frequent use. Most laser printers have a feature that alerts you when the fuser unit needs replacing. A noticeable sign indicating the need for a fuser replacement is when your printouts start to exhibit smudging or smearing. This occurs when the fuser fails to heat the toner particles enough to melt them onto the page entirely.
To Install the Fuser
All you need to do is simply follow these straightforward steps:
- Begin by turning off the printer and disconnecting the power cord from the power source. This ensures your safety and prevents any electrical mishaps during the process.
- Lower the rear output bin cover of the printer. This will allow you to access the fuser assembly more easily.
- Locate the two screws that secure the fuser assembly in place. Gently loosen these screws using an appropriate tool. Be careful not to damage the screws or any other components nearby.
- Once the screws are loosened, carefully pull the fuser assembly straight out of the printer. Take your time to avoid any unnecessary force or damage to the assembly or other printer parts.
- Position the replacement fuser correctly before inserting it back into the printer. Start by aligning the left side of the replacement fuser with the corresponding slot or guide in the printer. This ensures proper alignment and smooth insertion.
- Slowly and steadily insert the replacement fuser into the printer, ensuring it slides in smoothly without resistance. Ensure that it is securely seated in the designated slot.
Maintenance Box
The maintenance box serves as a storage container for ink flushed from the system while cleaning the print head. It is essential to replace the maintenance box when an ink cartridge is empty or has reached its lifespan. Commonly used maintenance box brands for printers include Epson and Lexmark.
Need Help?
Ensuring proper maintenance for your printer is essential to avoid potential damage and excessive wear and tear. Ignoring any alerts can lead to permanent damage and the need for costly replacements. Therefore, it's essential to take good care of your printer.
Regular printer maintenance might seem tedious, but ensuring your printer works efficiently and produces high-quality prints is critical. We recommend exploring our informative blog on troubleshooting printer issues or checking out various flexible support options for your printer maintenance requirements to save time and effort.
Our blog contains helpful tips and tricks to troubleshoot common printer problems, such as paper jams, poor print quality, and connectivity issues. By following the step-by-step instructions, you can fix most printer problems quickly and easily.


